What to Expect During a Fence Installation Project
Planning a fence installation project is a big step. Many homeowners are unsure about what actually happens once the work begins. You may wonder how long it will take, what permits are needed, how your yard will look afterward, or whether the project will disrupt your routine.
These are normal concerns. A fence is a long-term investment, and you want it done correctly. Understanding the full fence installation process helps you feel confident and prepared. When experienced professionals handle the work, the process becomes simple and organized. With fence installation from Pioneer Fence Company in Banning, CA, careful planning and expert craftsmanship yield durable, attractive results. Here is what you can expect from start to finish.
Step 1: Consultation and Property Evaluation
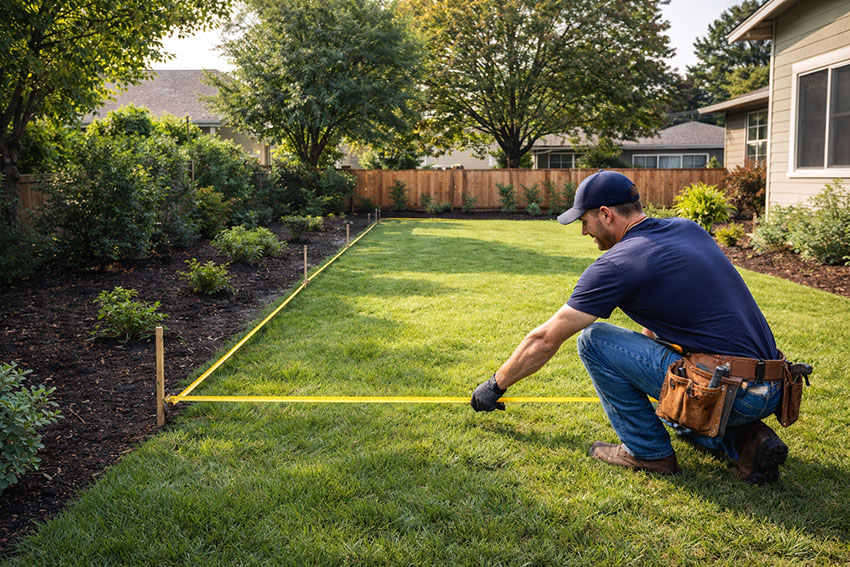
Every fence installation begins with a clear plan. The first step is a consultation and property review. This stage sets the foundation for the entire project.
During the evaluation, a professional fence contractor will:
- Measure property boundaries
- Review property lines
- Check the yard slope and soil condition
- Discuss fence height and design
- Identify underground utilities
- Review local building codes
- Provide a written estimate
Accurate measurements prevent mistakes. Property boundaries are important to avoid disputes with neighbors. Reviewing city regulations ensures your fence complies with local rules in Banning, CA.
You will also discuss your goals. Do you want privacy? Security? Curb appeal? Clear communication during this step helps avoid confusion later.
If you want more helpful homeowner guidance about fencing and property upgrades, check out our blog for additional tips.
Step 2: Choosing the Right Fence Material
The material you choose affects how your fence looks, how long it lasts, and how much maintenance it requires. Each material has its own strengths.
Here are common fence installation options:
Wood Fencing
- Provides strong privacy
- Offers a natural appearance
- Can be painted or stained
- Works well for backyard spaces
Wood fences are popular because they are versatile and affordable. However, they require regular maintenance.
Vinyl Fencing
- Low maintenance
- Resistant to moisture
- Does not rot or warp
- Long lifespan
Vinyl fencing is ideal for homeowners who want durability without frequent upkeep.
Chain Link Fencing
- Budget-friendly
- Strong and practical
- Good for security and boundaries
Chain link is often used for side yards or properties that need visibility with protection.
Wrought Iron or Steel Fencing
- Extremely strong
- Decorative appearance
- Long-term durability
Metal fencing adds security while maintaining an open look.
Choosing the right material depends on your priorities. If you would like to compare materials in more detail, visit our services page to explore your options.
Step 3: Preparing Your Property
Preparation plays an important role in a smooth installation process. A little planning helps avoid delays.
Before installation begins, you may need to:
- Clear furniture or decorations near fence lines
- Remove debris
- Trim bushes or tree branches
- Secure pets indoors
- Confirm property markers
Utility lines must be marked before digging begins. It protects water, gas, and electrical systems.
Preparing the area ensures workers have clear access. It also helps speed up the project timeline.
When homeowners prepare properly, installation often moves faster and more efficiently.
Step 4: Fence Post Installation
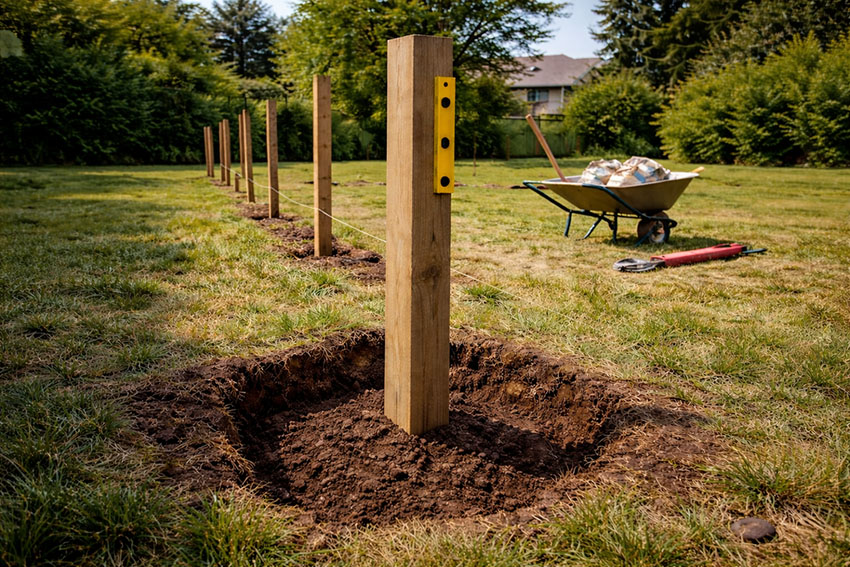
Fence posts are the backbone of the entire structure. If posts are not installed correctly, the fence may lean, shift, or weaken over time.
During this stage:
- Post holes are dug to the correct depth
- Soil conditions are assessed
- Posts are placed and aligned
- Concrete is poured for stability
- Posts are allowed time to cure
Most fence posts are set two to three feet deep. It provides strength and stability.
Proper spacing between posts is also critical. Even spacing ensures panels fit correctly and maintain balance.
Professional installation during this stage prevents long-term issues and helps the fence remain straight for many years.
Step 5: Installing Panels or Boards
Once the posts are secure, panels, rails, or boards are attached. This stage brings the fence to life.
Installers will:
- Attach rails securely
- Position panels evenly
- Check alignment frequently
- Confirm consistent height
- Secure hardware tightly
Careful alignment ensures the fence looks clean and professional. Small adjustments during this stage make a big difference in the final result.
Attention to detail improves both appearance and durability.
Step 6: Gate Installation and Final Adjustments
If your fence includes a gate, it is installed after the main sections are complete.
Gate installation involves:
- Reinforced gate posts
- Proper hinge placement
- Secure latch installation
- Alignment adjustments
- Testing smooth operation
If the gate includes an automatic system, motors and safety sensors are carefully tested.
A properly installed gate should open smoothly and close securely without dragging or sticking.
Final adjustments are made to ensure balance and proper movement.
How Long Does Fence Installation Take?
The timeline depends on several factors:
- Fence length
- Material type
- Yard size
- Soil condition
- Weather
- Permit approvals
Most residential fence installation projects take between one and three days. Larger or more complex projects may take longer.
An experienced fence company keeps the project organized and communicates clearly about timing.
Weather conditions may also affect the schedule, especially if heavy rain delays concrete curing.
Common Questions About Fence Installation
Do I Need a Permit?
Permit requirements vary by city. A professional fence contractor can confirm whether your project in Banning, CA requires one.
Will My Lawn Be Damaged?
Minor soil disturbance around post holes is normal. Installers clean up debris and level areas after completion.
How Deep Are Fence Posts Installed?
Fence posts are typically set 2 to 3 feet deep to provide adequate support.
Can I Stay Home During Installation?
Yes. Most homeowners remain in their homes during installation. The crew only needs access to the yard.
Why Professional Fence Installation Matters
Fence installation requires skill, planning, and the right equipment. Mistakes during installation can lead to uneven panels, weak posts, and early repairs.
Hiring an experienced fence contractor ensures:
- Accurate measurements
- Code compliance
- Proper post depth
- Straight alignment
- Quality materials
- Long-term stability
Professional fence installation protects your investment. It reduces future repair costs and improves overall performance.
Pioneer Fence Company proudly provides dependable fence installation services for homeowners in Banning, CA. Our focus is durability, clean workmanship, and reliable results.
Conclusion: Careful Planning Creates Lasting Results
Fence installation is not just about placing posts in the ground. It involves planning, preparation, and precise execution. Each step builds on the next.
When the process is handled correctly, the result is a strong and attractive fence that protects your property for years.
Ready to Start Your Fence Installation Project?
If you are planning a fence installation in Banning, CA, Pioneer Fence Company is ready to help. Our team provides careful planning, quality materials, and reliable workmanship on every project.
To get started, contact our team today to schedule your free estimate and secure your property with expert fence installation from Pioneer Fence Company.
Recent Blog
Contact Us Now
Reach out today and let our team help you protect and improve your property.